Omnia (PDE) gives you the ability to create the stocktake and scan the product while walking the store.
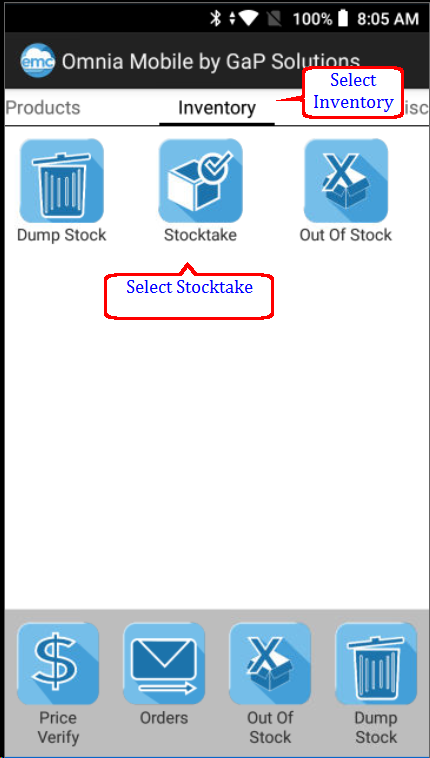
Login in to Omnia select Inventory then select Stocktake.
PLEASE NOTE If you perform a LIVE stocktake meaning while the store is trading then please ensure the stock being sold is counted first.
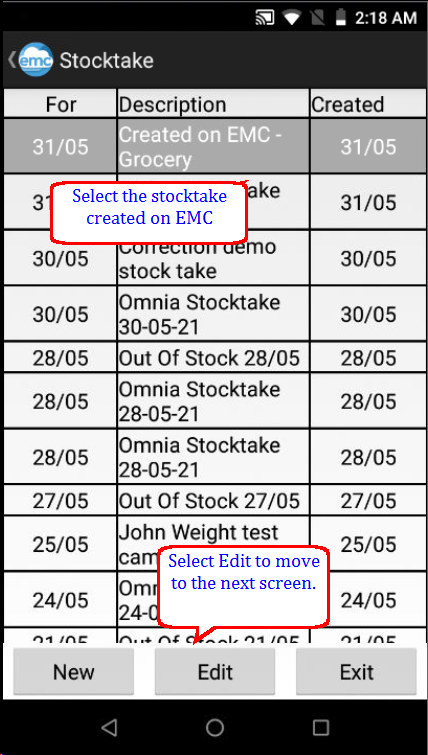
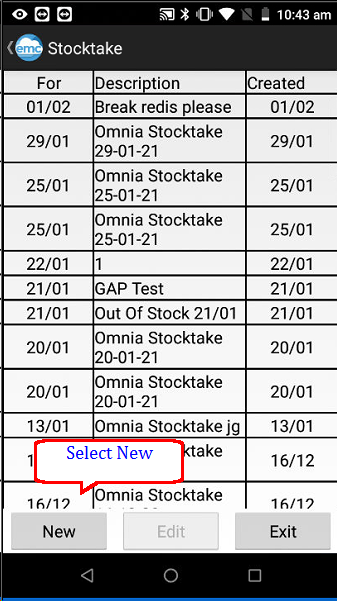
You may see a list of currently open or in progress stocktakes, Select new to create a new Stocktake or highlight a current stocktake in progress and edit this if you wish to add to it. At the end of this topic I explain how you can generate a new stocktake based on one already created for you in EMC
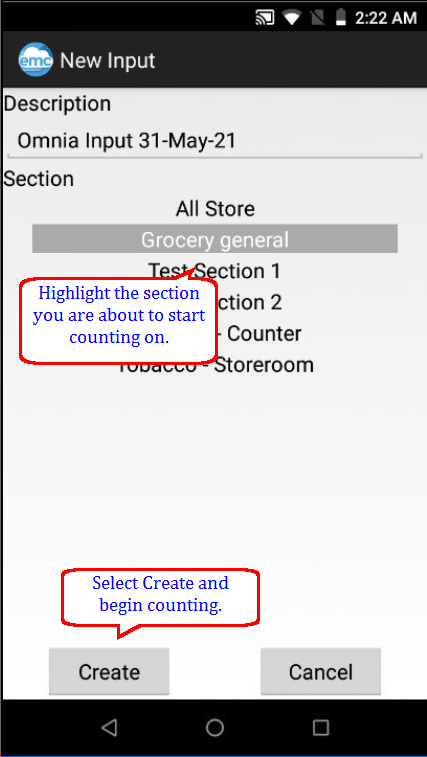
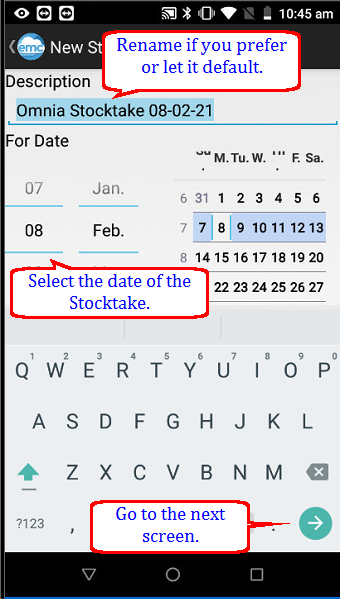
You can leave the stocktake description as is or simply start typing in a new description using the keypad on the PDE unit. select the date then use the side arrow to move to the next screen.
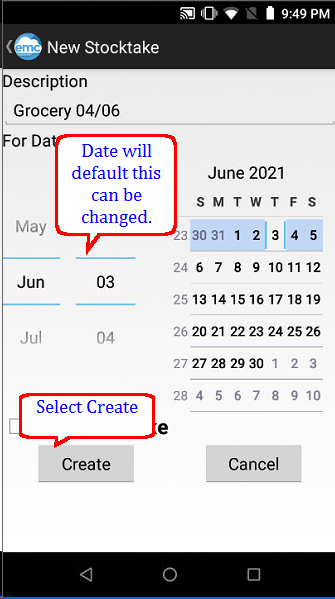
Select Create.
The next screen will appear and allow you to select the section you want to perform the stocktake in, once highlighted select create.
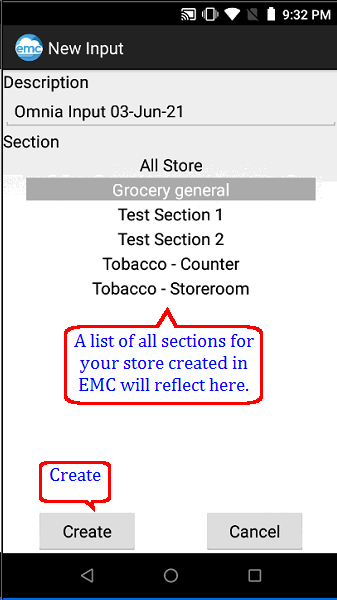
Please note that selecting sections allows you to keep track on what areas of your store has or hasn't been counted, it also allows the stocktaker to take ownership of their count, as a section/s can be allocated against a specific person/s or Team name.
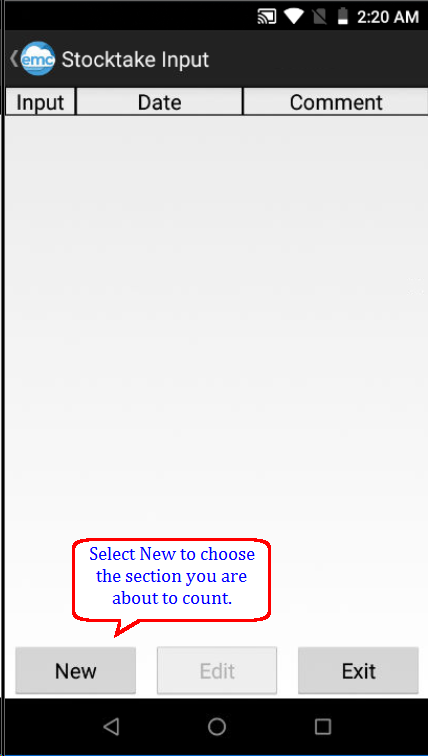
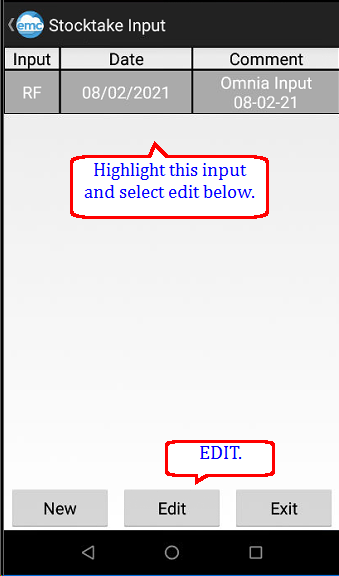
Select the input and select edit.
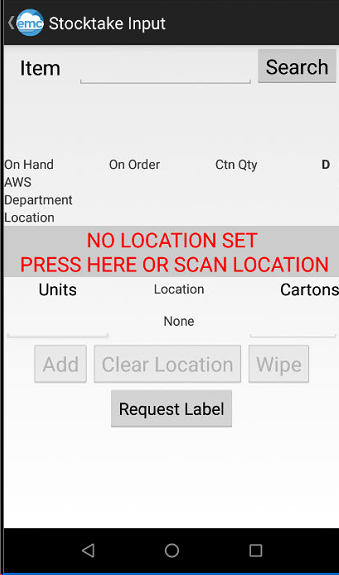
Begin scanning. Locations can also be setup on the products at the same time that the stock is counted if this is required scan the location label first and then the product in that location, repeat as you move and count the different bays. If not required you can just begin to scan and count, in other words you can leave the screen with this message and no locations will be altered or entered.
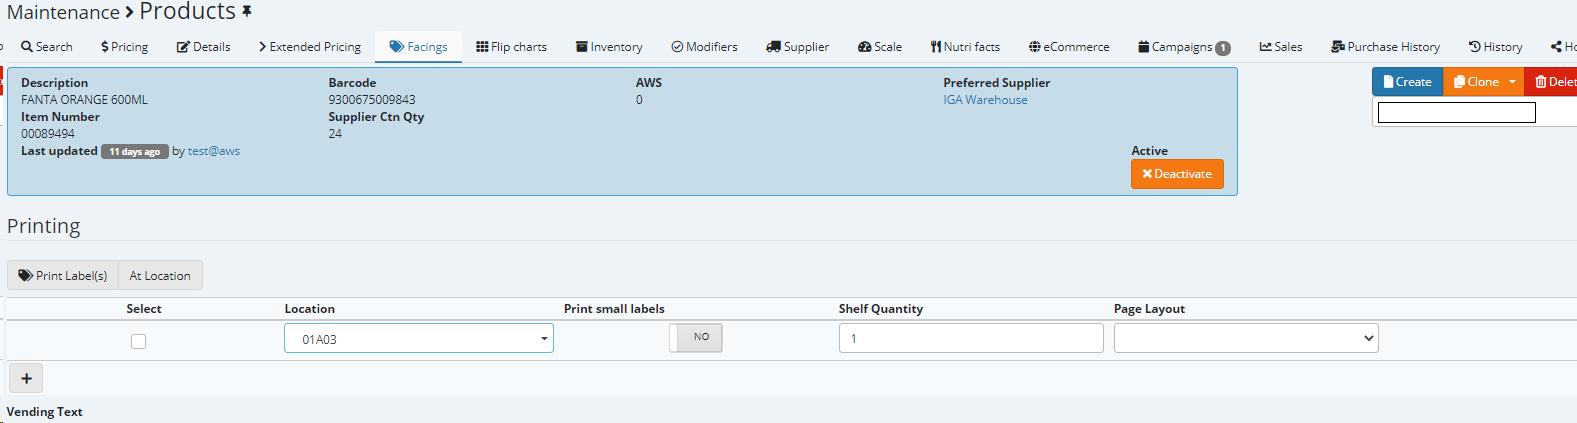
Example of location set in Maintenance - Products > facings
Enter the units and /or cartons .. .repeat until completed.
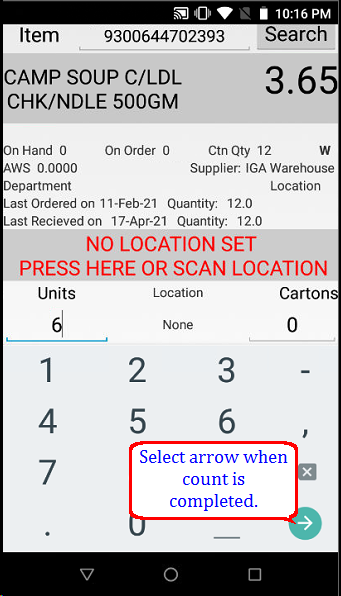
Once completed press the side arrow to take you back to the stocktake input.
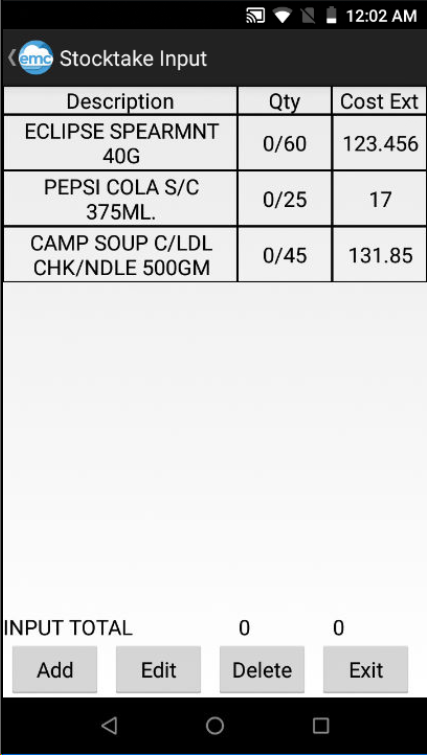
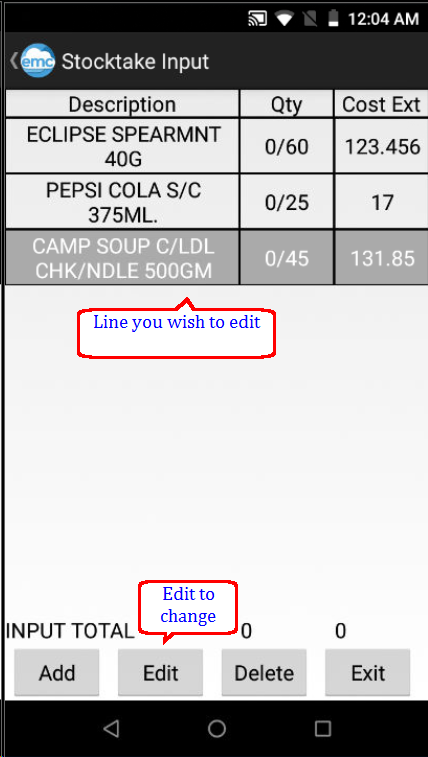
If there is a error in the count you can highlight the relevant line, select edit and correct it. example shown below
Locate and highlight the line incorrectly counted and select Edit.
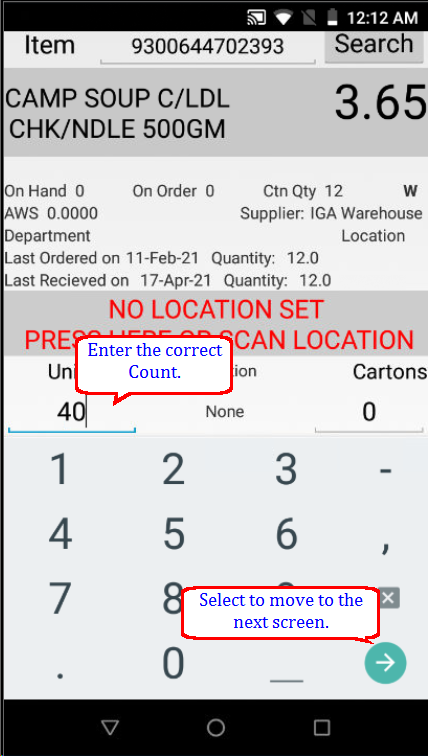
The product you have selected above will auto populate. Enter the correct amount and select the right hand arrow. To go to the next screen
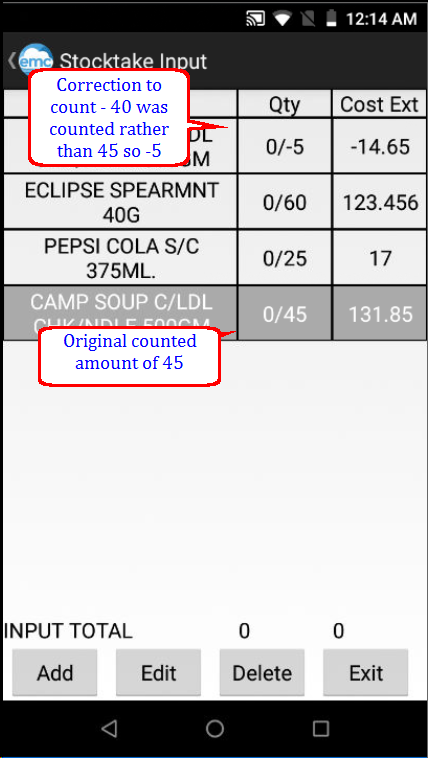
Originally 45 units were counted, there should have been only 40 the top line shows the correction of -5
How the corrected input looks on EMC
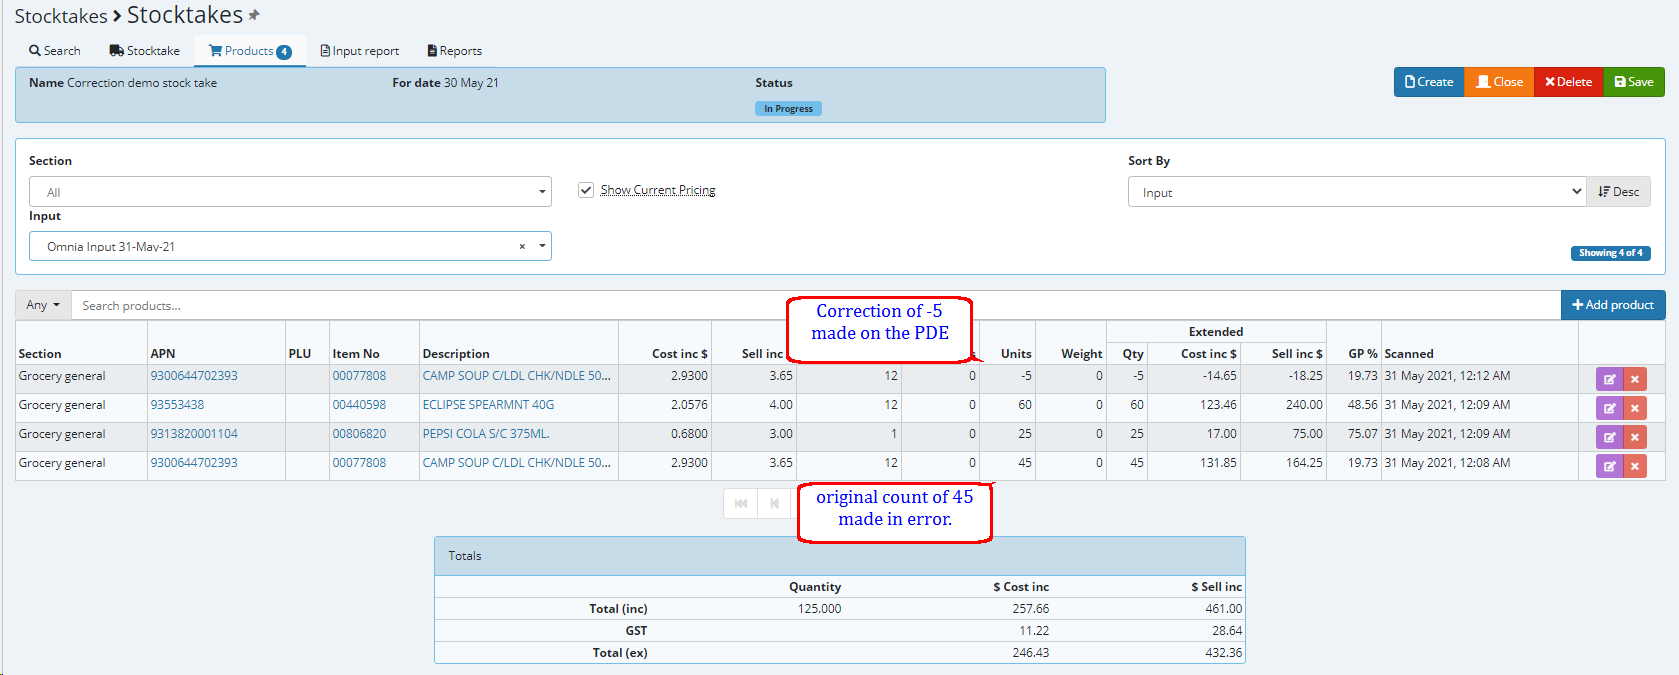
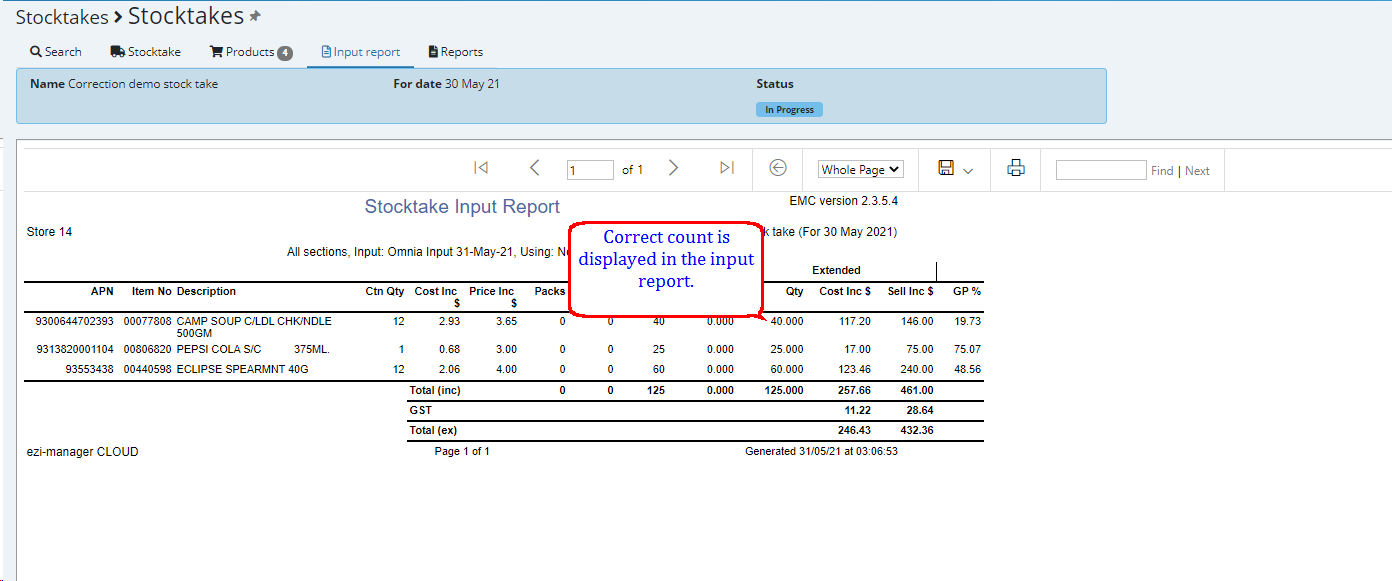
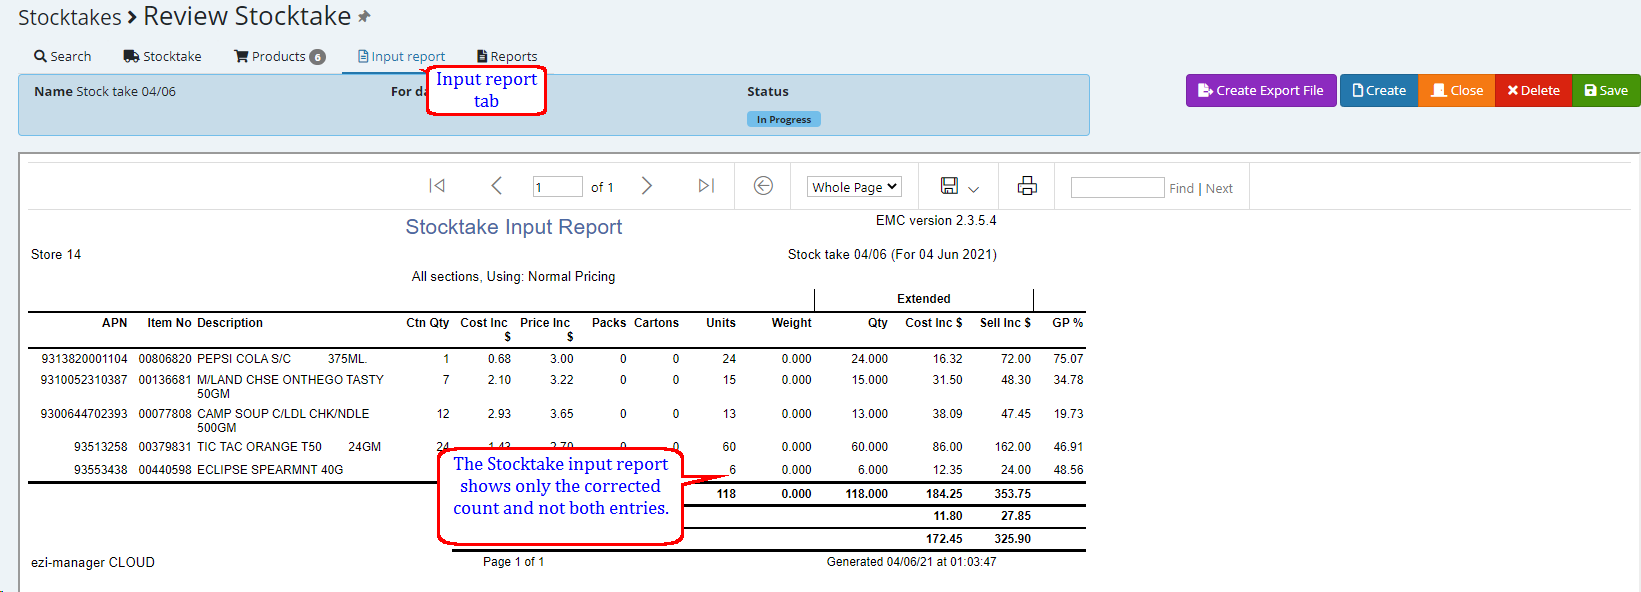
Input report shows the corrected count of 40
On EMC
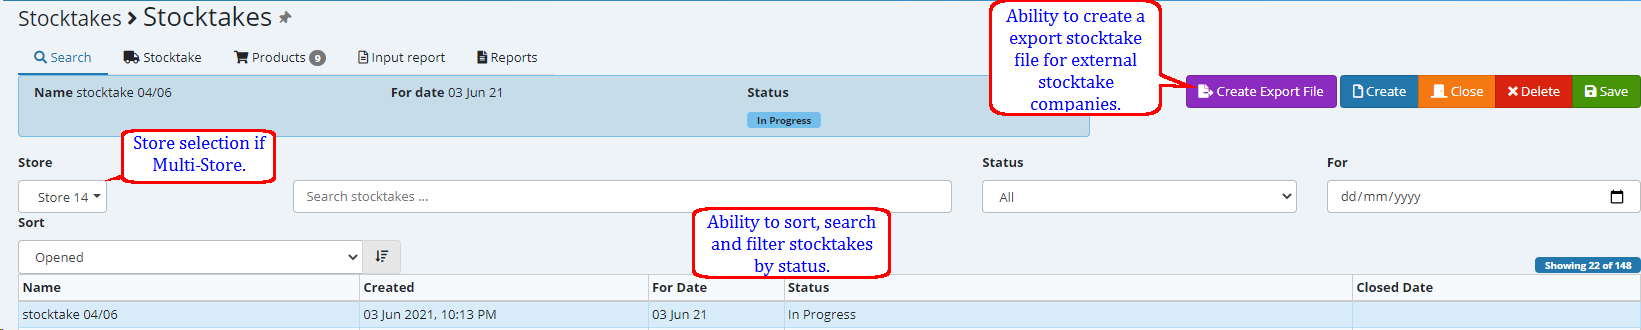
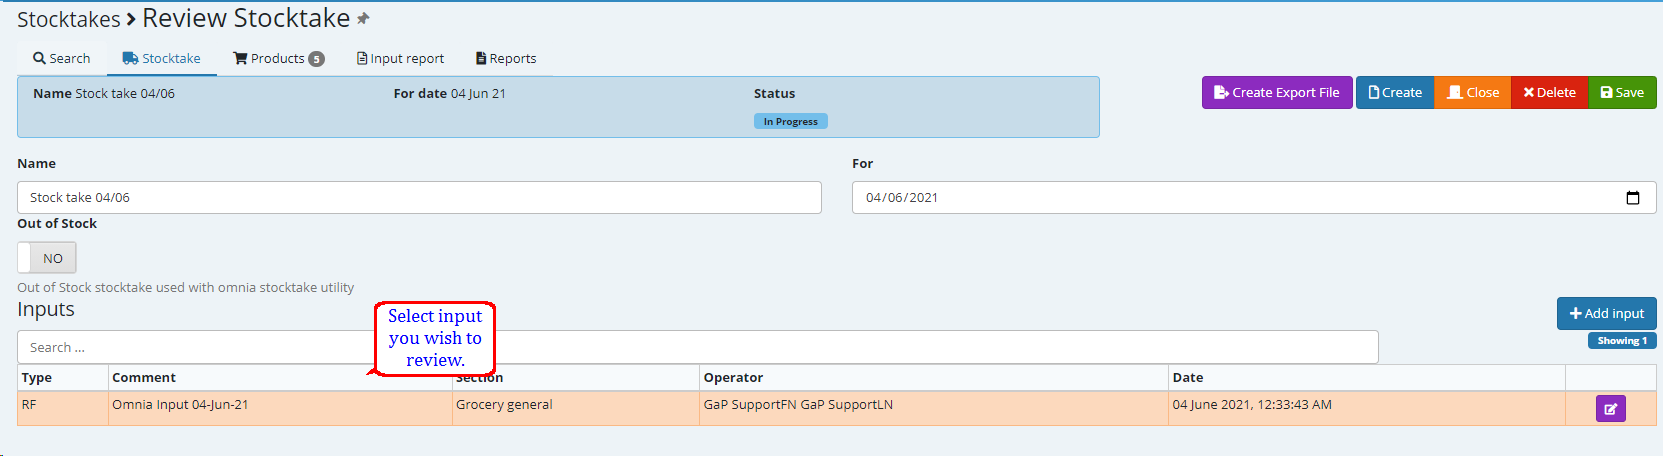
Select Stocktakes then select Review Stocktake locate the stocktake you wish to complete. If Multi-Store you will be required to select the store who's stocktake you are reviewing.
Select the input you wish to review.
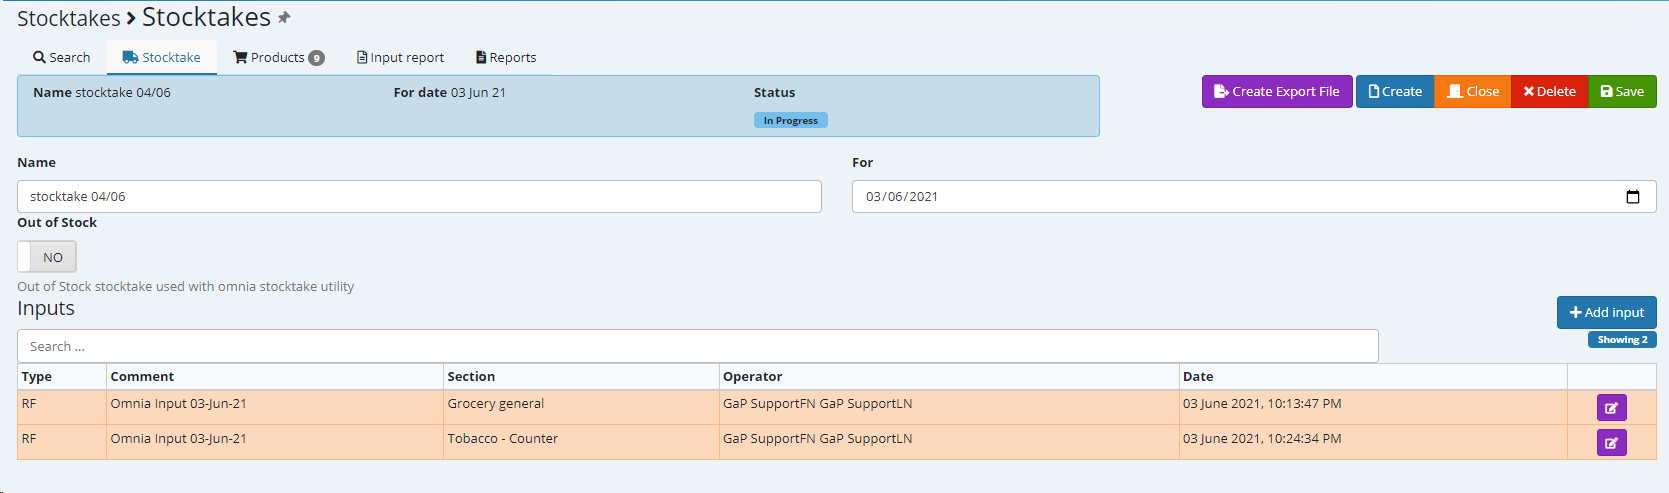
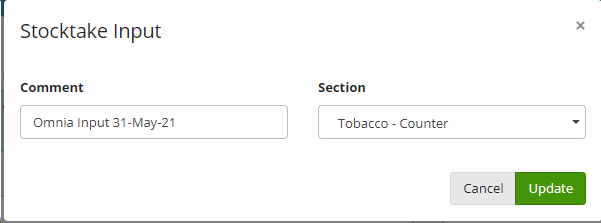
If you edit the input you can modify the comment to perhaps include the persons name that took the stocktake. ![]()
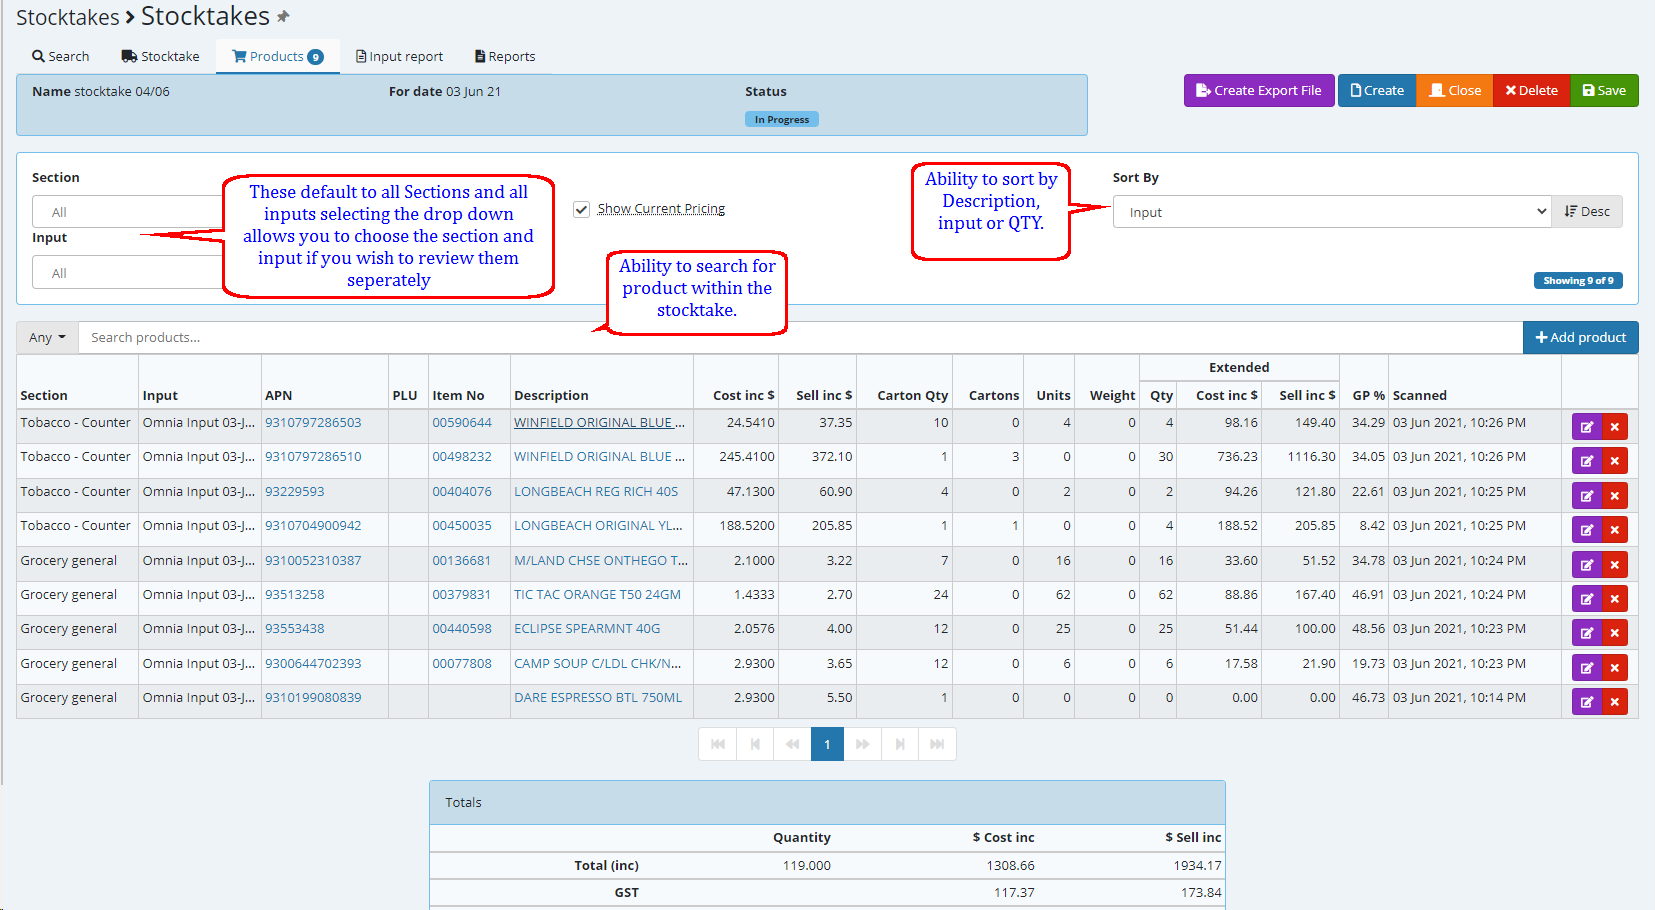
Selecting the input will take you into the products tab where you have the ability to review the stocktake as well as run the input report. you also have the ability to view one input / section at a time or all inputs / sections together.
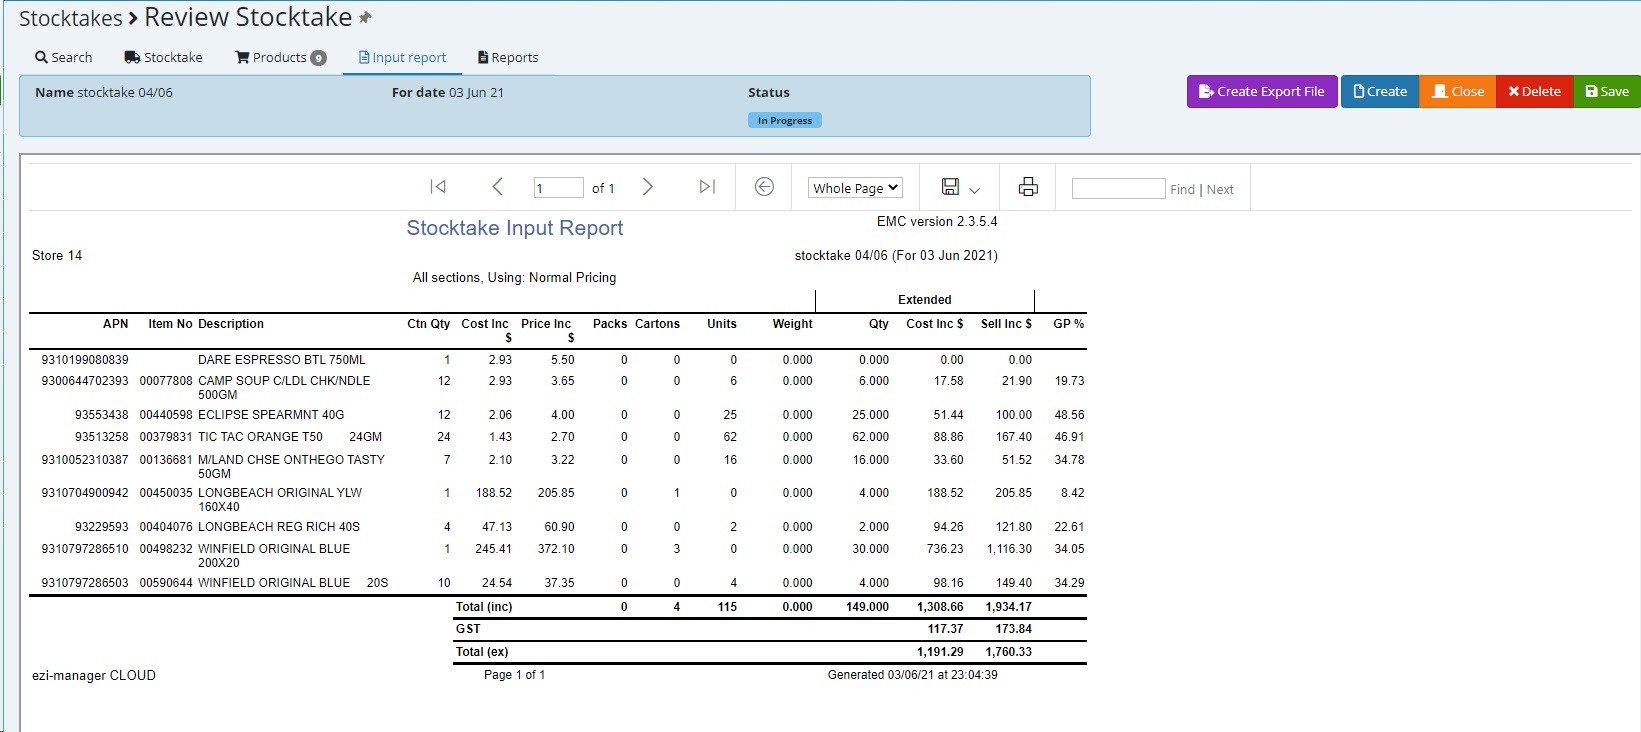
Example of the input report.
Please note if you wish to fix an scanned incorrect count manually follow the procedure shown below.
Steps below on how to fix a count error created via Omnia - through EMC
If you notice a error in the stocktake counted using the PDE unit then you can do the following to correct it in EMC.
Select the input through the relevant stocktake
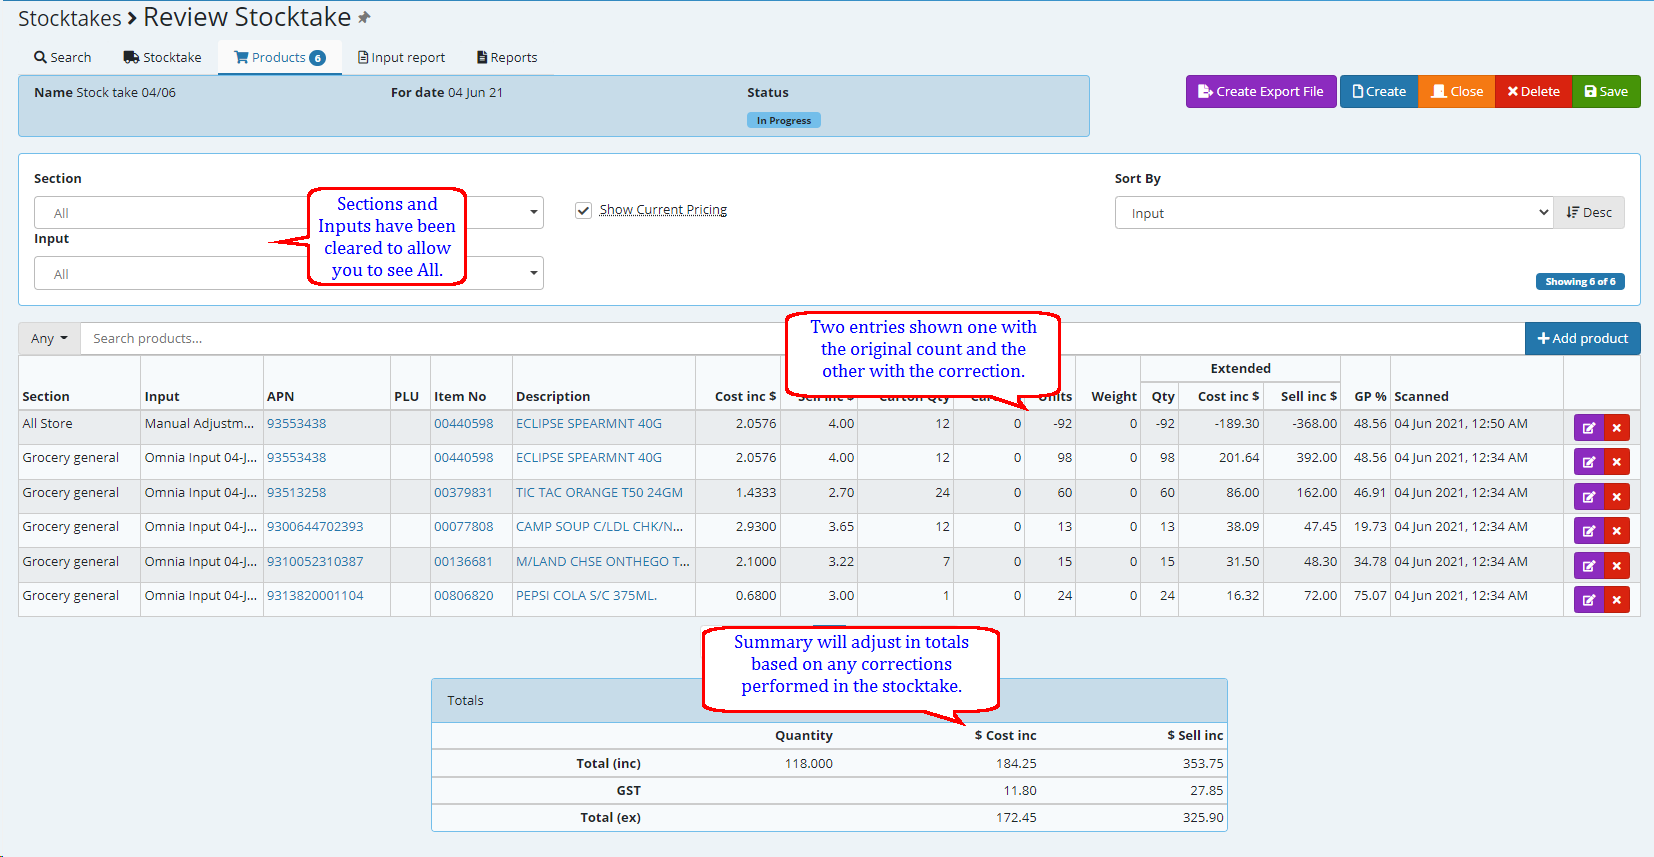
In this example Item number 00440598 has been counted as 98 units where it should have been 6
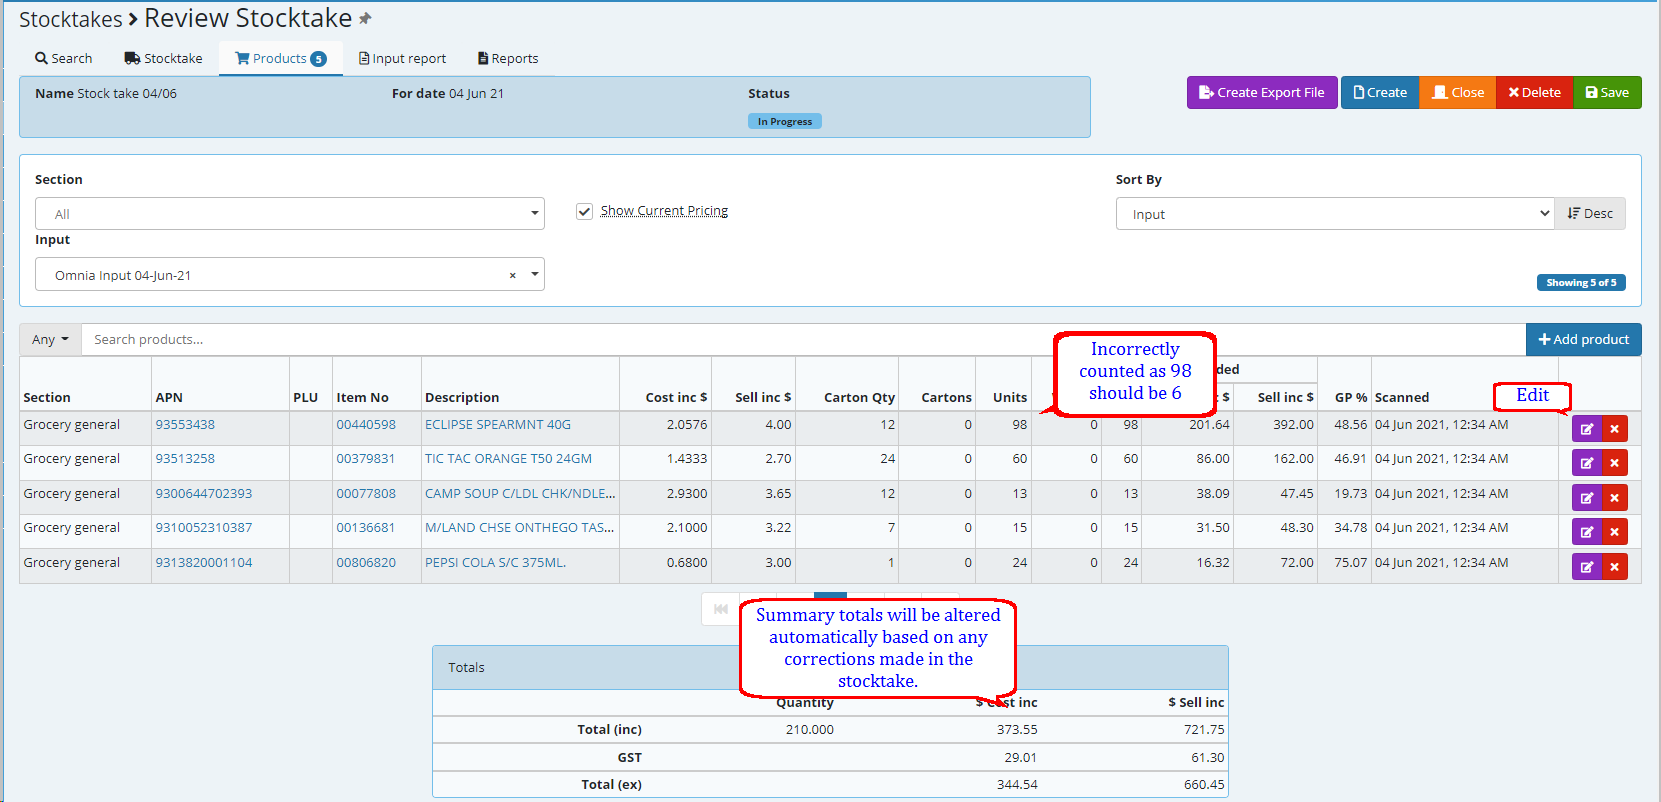
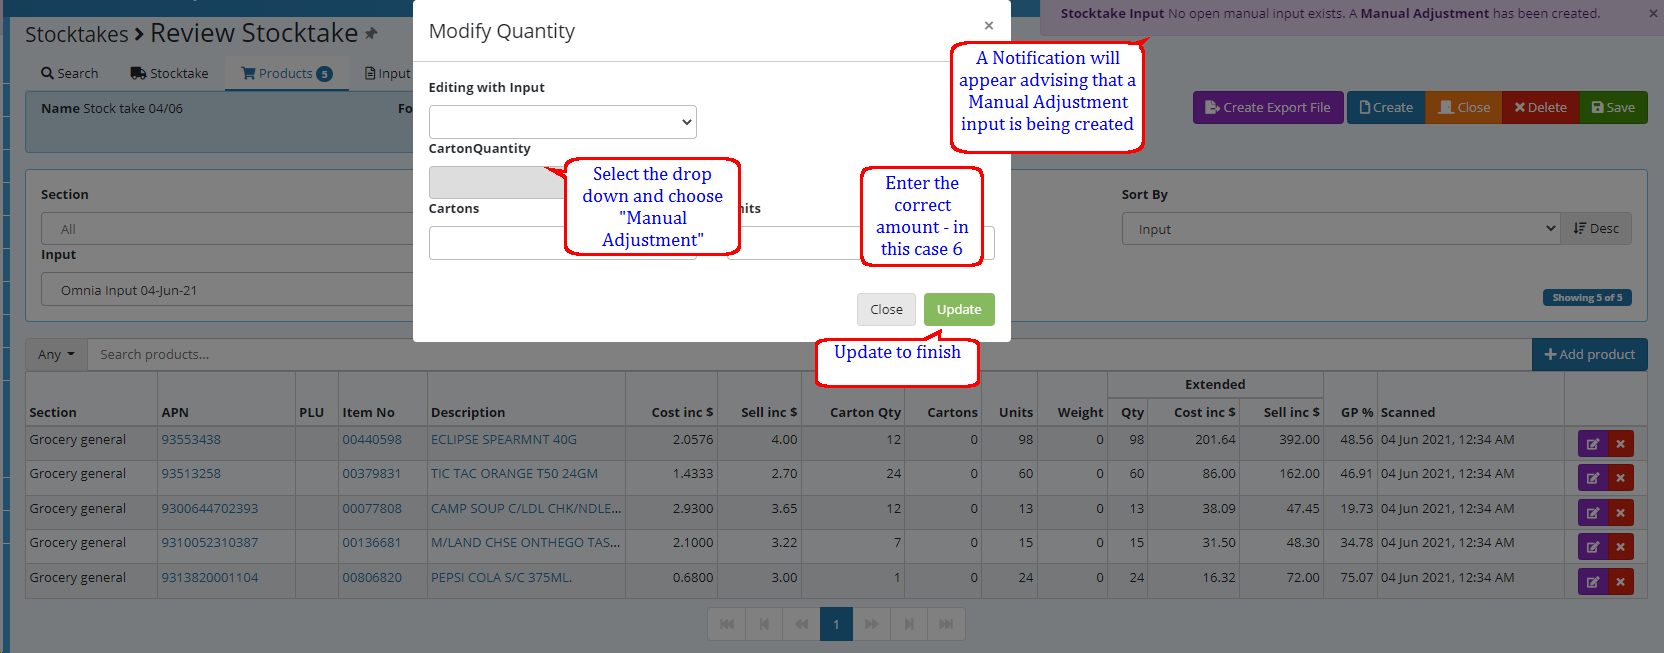
Edit the line with the count error.. ![]()
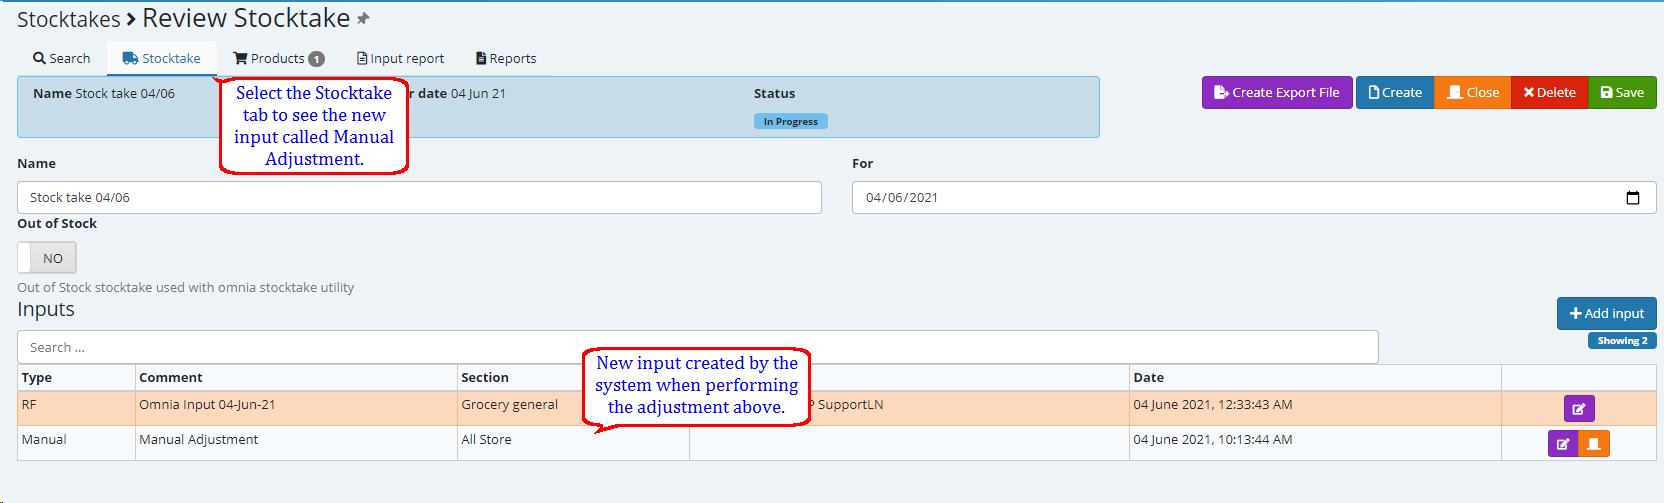
Select the stocktake tab and you will now see the manual adjustment input
When you highlight the newly created section you will have the ability to see the corrections made.
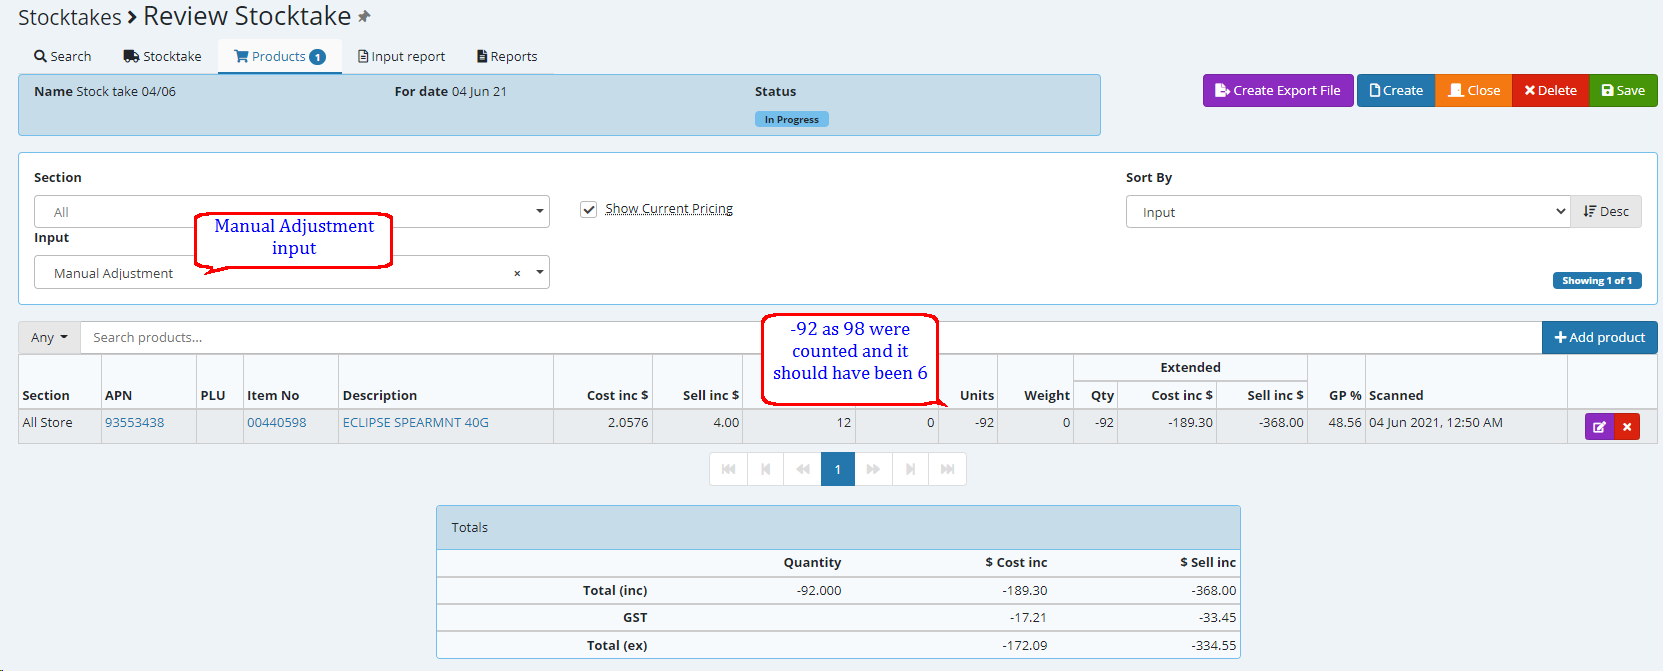
Selecting All sections and All inputs will show you both the original stocktake as well as the correction.
Once you are happy with the stocktake, choose CLOSE - this will close the stocktake not allowing any further inputs.
![]()
You have the ability to view/save/print the input report.
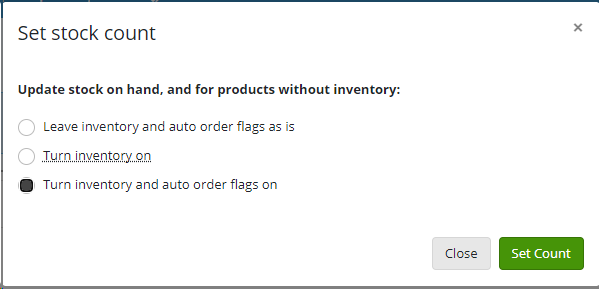
Set the COUNT and choose the option relevant to the store.
![]()
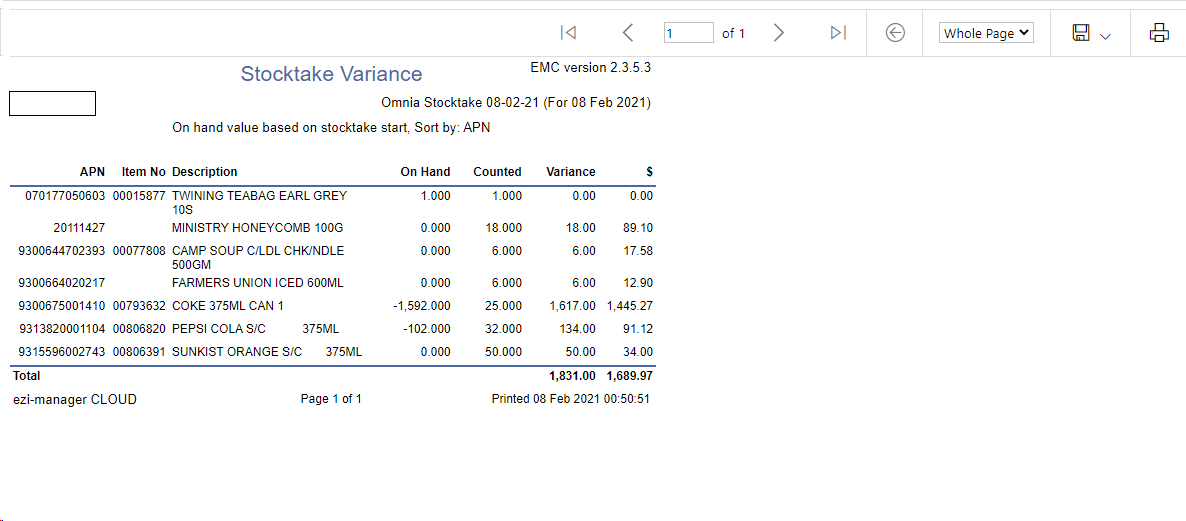
You have the ability to run a variance report (based on last count vs current) as well as the ability to set filters and sort by as suited.
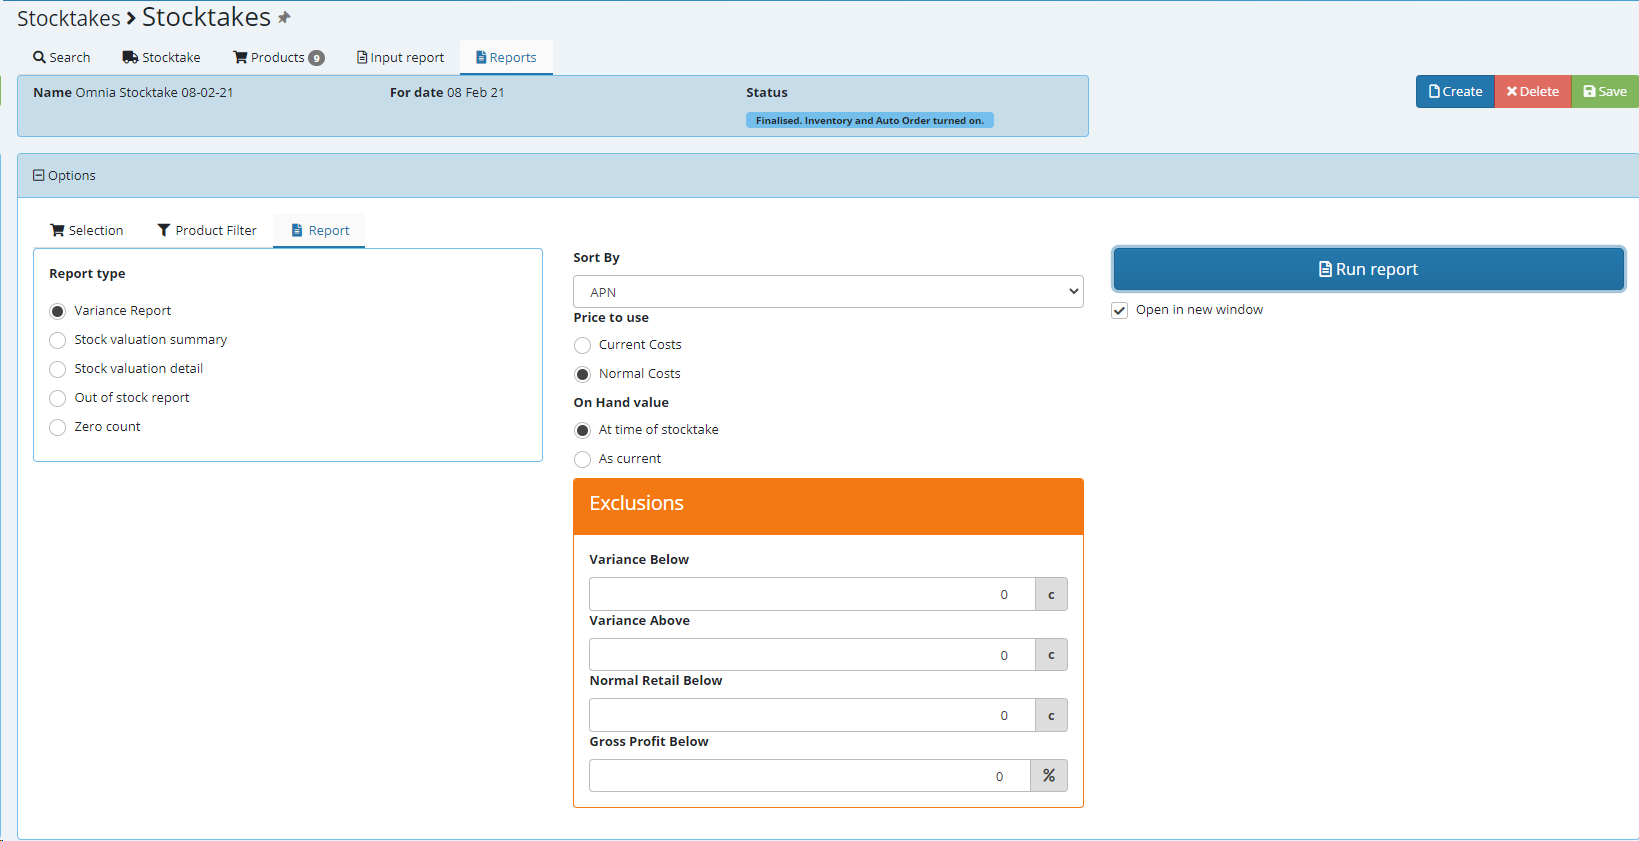
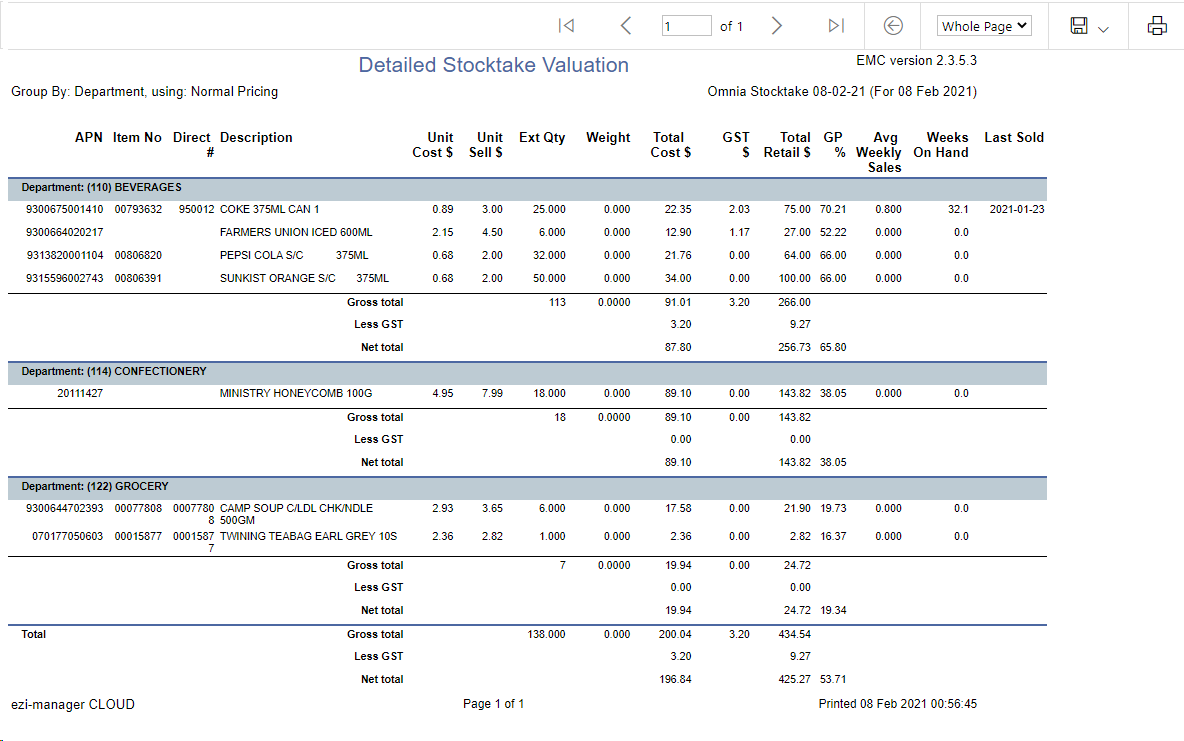
You have the ability to view/save or print the stock valuation report
Side Note ::::
The stocktake can also be manually created on EMC. Once selected on Omnia the input can be added and product scanned as explained in the beginning section of this topic.